About Vanna
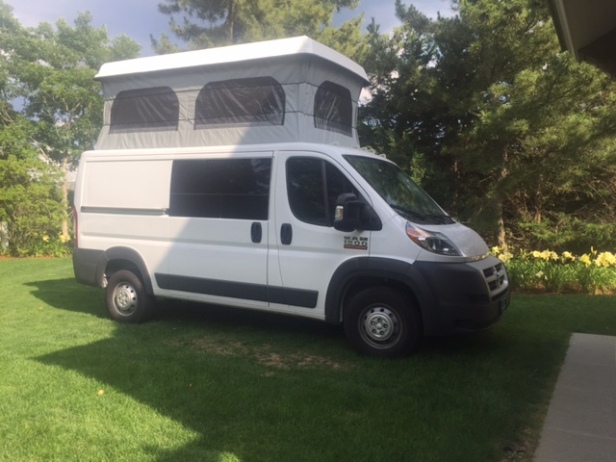
Vanna is an 118” wheelbase low roof Dodge Ram Promaster 1500 with a diesel engine and retrofitted with a pop-top installed by Colorado Camper Van. She was purchased in Boulder Colorado and transported by a friend to Loveland Colorado for her initial adaptation. I chose this model van for three primary reasons: it gets approx. 26 mpg (before and after conversion), is front-wheel drive, and is six inches wider than any other van on the market.
In addition to installing a pop-top, Colorado Camper Van installed two venting windows, a Renogy solar panel, a Xantrex Freedom HF inverter/Charger, two Interstate house batteries, and an Espar Airtonic D2 diesel heater. I consider Colorado Camper Van’s work to be mediocre. Communicating with their new sales rep was very challenging and their attention to detail seems to be lacking. Specifically, they forgot to caulk some holes they drilled through the van and the canvas in the pop top is poorly attached to both the van and the top in many places. This has led to leaking and drafts. I am, however, very happy with the decision to have a pop-top. While it is less of a stealth camper than a high roof van, it allows us to pack a lot into a small wheelbase and has proven plenty comfortable, even with a 58-pound four-legged Collie. It also allows us to keep the bed made all the time requiring very little conversion from one phase of living to another. We have lived in Vanna for two weeks so far and would only change the location of the switch for the water pump. We left extra length in those wires and plan to change this on the road sometime soon.
Here are a few pictures and explanations of Vanna’s evolution along with some information about the build-out. I am happy to provide more detail to anyone if requested. When reviewing, please take into account that this was my first camper van build, and I accomplished it with a minimal skillset.
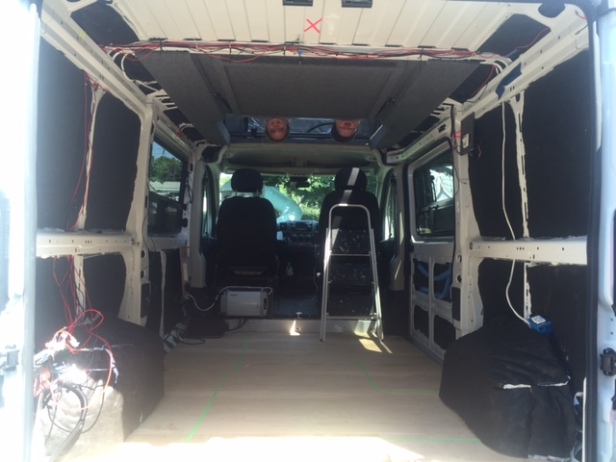
Noise Proofing:
I researched the least toxic noise reduction panels (Noico Panels) and adhered them as instructed. The difference was remarkable!
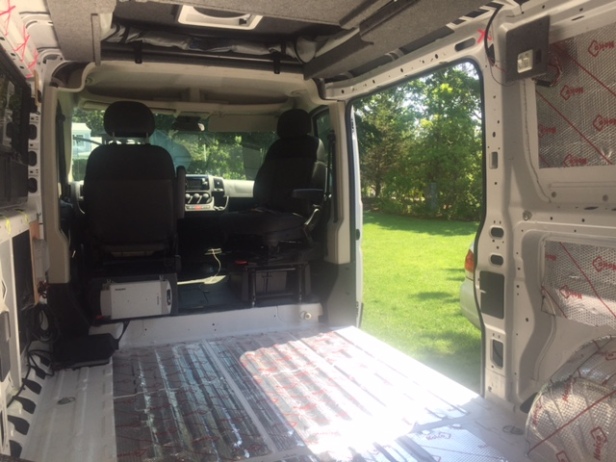
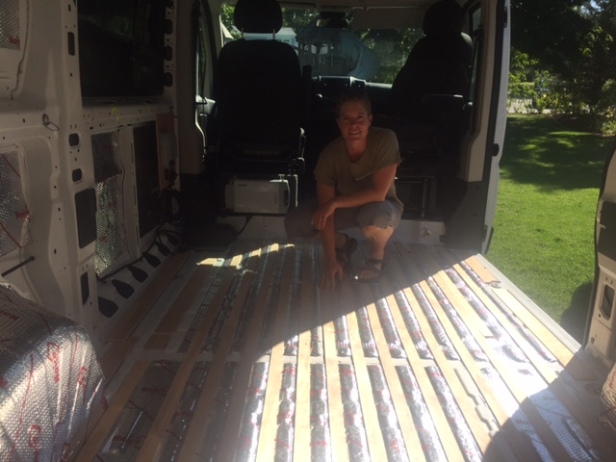
Floor Insulation
I then laid down a sub floor. For the sub floor, I first filled the grooves in the floor with ¼” luan to make a level surface, adhered 1” polystiro insulation board, then placed another 1/4” luan on top of the insulation board. I glued the foam and luan down with contractor grade “Great Stuff” expanding foam and weighted it down with boxes of leftover tiles from my parents’ house construction. I then filled in the two exposed edges near the rear doors and the slider with 1”x 1” spruce and screwed the floor down to create a clean edge for entry and exit. I intended to lay down vinyl flooring, but the order came in incorrectly and the delay ultimately led to me building out the van and simply painting the sub floor. Given the minimal amount of floor that is visible, I think paint was a perfectly fine and economical decision.
Wiring
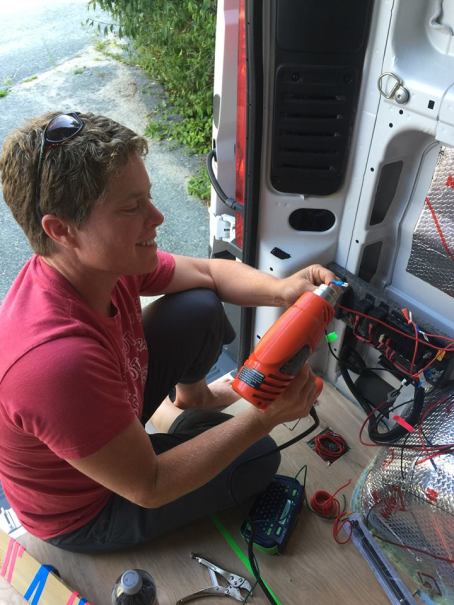
Thank goodness for the expertise of others! Mickey Cavacas, an engineer from the Sea Education Association in Woods Hole, Massachusetts, taught us how to wire the additional lights, water pump, etc. DC electric is fun! We also ran an AC wire from the inverter to an outlet conveniently located under our table so that we can charge our laptops and phones while working.
Wall Insulation
I then insulated Vanna with Thinsulate. Thinsulate is easy to cut with sharp scissors, is hydrophobic, and does not have fibers that separate and become air-borne. It is also pretty expensive, but the pros outweigh this con. I cut large pieces and glued them to the large panels with 3M spray adhesive. I then cut strips of Thinsulate and fished them into all the channels or ribs of the van. This process took approx. eight hours. I decided not to add a vapor barrier. There is SO MUCH conflicting info. about vapor barriers on-line, but I decided I was unlikely to install one well enough to keep all moisture out of the walls and preferred to allow air to circulate and dry up any moisture between the insulation and van wall. After breathing and cooking in the van, and recognizing the moisture that develops, I feel comfortable with this decision.
Vanna as a Clubhouse
This evolution brings Vanna to her “clubhouse phase.” This is the week-long period where my nieces and nephews decided that she was the coolest thing ever and wanted to hang out in Vanna for a disproportionate amount of their free-time. Here are some pictures of them feeling right-at-home. This also helped me learn more about the depth of Vanna’s house battery bank since they kept leaving the fan whenever they left the van 🙂


The Build-out with Toby
My friend Toby was the master carpenter that made Vanna’s design in my head into a reality. Thank goodness for talented and generous friends! Toby’s construction approach of using ½” plywood and pine saved me several hundred pounds of weight over my idea of using ¾” plywood. He also tweaked my design to add some uniformity and functionality, such as kicks under the cabinets. The work also went REALLY quickly with his help.


The “Final” Product
Once back in Cape Cod, Emma helped me with all the finish work. We added paneling on the side and rear doors, added cherry trim to all the plywood edges, applied water based polyurethane to all the birch plywood, painted all the pine, built a kitchen cabinet/flip up counter, built a flip-down dining table, built an upper cabinet for the galley, painted the floor, installed the sink and stove and all the associated parts, and tended to dozens of finishing touches. We did most of this while listening to RadioLab podcasts ranging from the origin of penicillin to the evolution of debate as a sport. Who knew so many diverse topics could be so interesting! Special thanks as well to Pat Donovan who sewed Vanna’s curtains and to Major’s RV in Bourne, MA who installed a shore power outlet for us and helped with many other small questions!


